
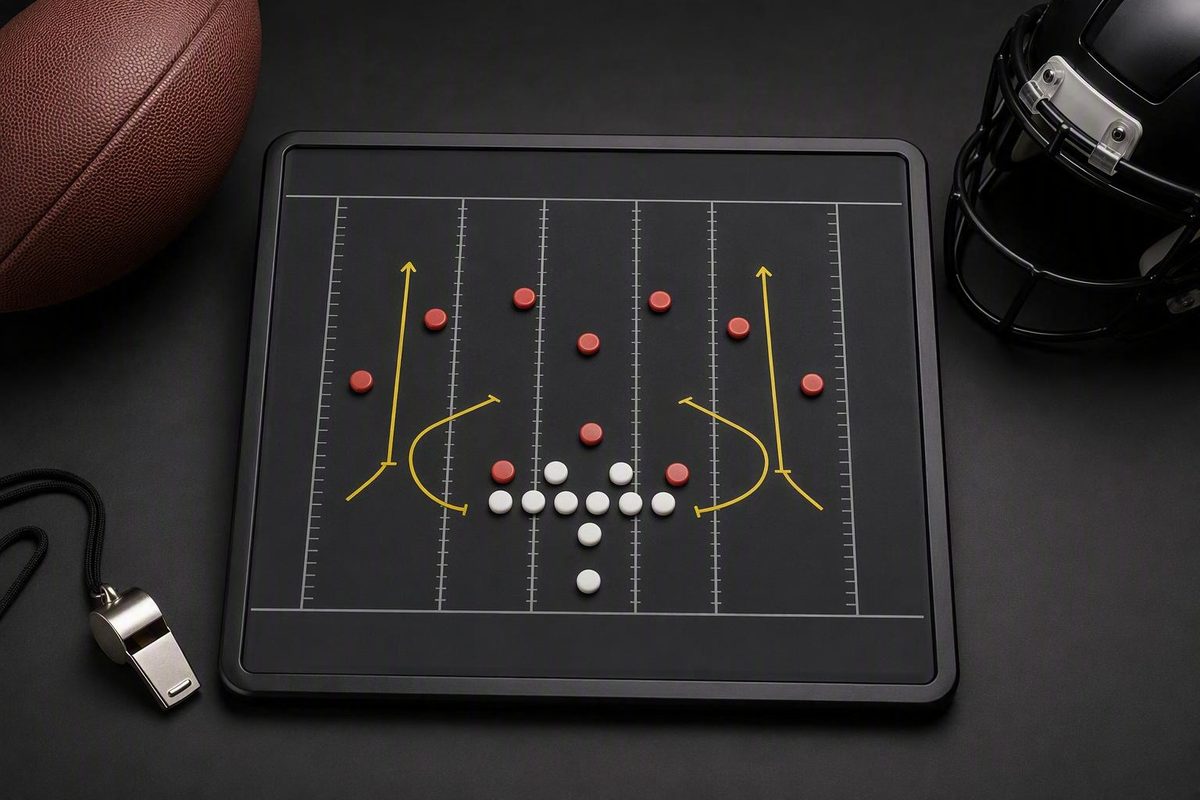
Smash is a two-level perimeter stretch: an outside receiver on a hitch or out beneath an inside receiver on a corner route, with one low defender caught between them. The quarterback picks a side before the snap, then reads that low defender and the safety after it. Low defender sinks under the corner route, throw the short route on time. Low defender squats or drives the short route, throw the corner route away from the safety. Neither clean, go to the named outlet. It is a read, not a coverage beater, and it fails most often when the quarterback is taught a coverage label instead of a defender.
Two checks make the base rule work. The short throw is only live if another underneath defender has not expanded into it. The corner throw is only live if the safety has not overlapped it. Three defenders over the two-receiver side is the signal to leave the pair through whatever reset or checkdown the call provides.
Pick what the low defender, the safety and the body count did; the throw updates in the panel.
Smash read: what did the defense do after the snap?
The low defender gained depth beneath the corner route and conceded the short throw. Deliver the hitch or out on the drop; do not wait for the corner route.
| Low defender | Safety | Bodies | Throw |
|---|---|---|---|
| Sinks | Holds | 2 | Short route on time, unless other underneath help closed it (then outlet) |
| Squats or drives | Holds | 2 | Corner route, away from the safety |
| Squats or drives | Overlaps | 2 | Named outlet |
| Widens under hitch | Holds | 2 | Corner route only if it has space; otherwise outlet |
| Widens under hitch | Overlaps | 2 | Named outlet (Cover 3 trap) |
| Any | Any | 3 | Leave the side: called reset or checkdown |
Rules follow the base high-low progression in this article. The corner-window-first alternative (Coaching Football Insights) uses the same three-over-two exit. Landmarks and outlets are system-specific.
Two Routes and One Defender in Conflict
Conventional Smash puts No. 1, the outside receiver, on a hitch or another shallow route and No. 2, the inside receiver, on a corner route. “Smash” usually names the combination rather than either route, though terminology varies by system. The defining structure is a short route beneath a corner route near the sideline.
That puts one receiver in front of the flat defender and one behind or outside him. In a Cover 2 picture the cornerback is usually that defender. In other structures an overhang, nickel or outside linebacker controls the flat. The offense reads how the defense distributes the two routes.
Landmarks are system choices. One published installation uses a six-yard hitch beneath a 12-yard corner route; another uses a five-yard quick out beneath an eight-yard corner. The Smart Football installation gives the six-yard/12-yard version, and The Spread Offense diagrams the five-yard/eight-yard quick-out version. Neither is a universal standard. Pick one set and build the quarterback’s drop to it.
The four base assignments:
- No. 1 outside: the underneath route. A hitch gives a fast settle throw; an out adds horizontal movement.
- No. 2 inside: stem vertically, break to the corner, find the space behind the low defender and away from the safety.
- Running back: protection first. If the protection lets him release, he is the checkdown below linebacker depth.
- Quarterback: pick a side, read the declared conflict defender, account for the safety, throw.
Do not coach the corner route against air with the sideline as its only landmark. The receiver works between two defenders. He has to clear the low defender without drifting into the deep safety, and the throwing window is defined by both bodies.
One Progression: Low Defender, Then Safety, Then Outlet
Teach a direct high-low as the base model:
- Select the Smash side before the snap.
- Key the cornerback or whichever defender controls the flat.
- Confirm the safety’s location.
- Throw opposite the conflict defender’s movement.
- Use the outlet if the picture is muddy.
“Corner down, throw high; corner high, throw low” is a fine starting phrase, but it is incomplete. When the corner sinks beneath the corner route, deliver the hitch or out on time only if underneath help has not expanded into it. When the corner squats or drives the short route, throw the corner only if the receiver has space away from the safety.
| Defender reaction | What it means | Decision |
|---|---|---|
| Corner sinks | Gains depth beneath the corner route | Short route on time if help has not closed |
| Corner squats or drives | Attacks the short route | Corner route if the safety has not overlapped |
| Underneath defender widens | Short throw is capped | Do not throw it late; use the outlet |
| Safety overlaps corner | High window is closed | Short route if clean; otherwise the outlet |
| Three over two | Both routes can be bracketed or exchanged | Leave the pair via the called reset or checkdown |
A completion does not rescue a poor read. A late hitch thrown through an expanding underneath defender is a correction on film even when it is caught. So is a corner ball thrown into safety overlap.
Some systems start with the corner-route window instead of the simultaneous high-low: the quarterback inspects the corner window first and, if it is closed, hitches to the next route in the called progression. Coaching Football Insights teaches that corner-window-first progression and recommends leaving the Smash side when three defenders cover the two-receiver pair (The Smash Concept Football: A Complete Guide). It is a valid installation. It is not the base model here, and the point is the same either way: choose one progression, attach one vocabulary to it and grade the quarterback against it. Do not say “read the corner high-low” in one meeting and “corner route first, then backside” in the next.
Pick the Side Before the Snap and Confirm It After
Give the quarterback a fixed order of operations:
- Safety structure: one high or two high.
- Corner depth and leverage: low or deep, inside or outside.
- Likely flat defender: corner, overhang, nickel or linebacker.
- Recheck the safeties immediately before the snap.
A low corner with a safety over him may produce the familiar Cover 2 window. A deep corner may shrink the corner-route window and make the underneath defender the more important body. Neither alignment proves the coverage. Cushion and leverage select a side; they do not decide the ball.
The post-snap picture decides. Confirm the corner, the flat defender if he is a different player, and the safety. Rotation turns an attractive pre-snap side into a capped one often enough that the recheck has to be a habit.
Unless the call includes a coached full-field reset, stay on the selected half. Bouncing from one mirrored Smash pair to the other makes the throw late. A half-field installation finishes with its checkdown; a full-field installation defines exactly when and how the quarterback reaches the backside concept.
The film checklist for the side:
- One-high or two-high?
- What are the corner’s depth and leverage?
- Who looks responsible for the flat?
- How many defenders sit over the two-receiver pair?
- Where could the corner-route window develop?
- What is the outlet if the side is capped?
- Did a safety move before the snap?
This is the general safety-structure, corner-leverage and late-disguise sequence narrowed to Smash. The indicators are clues, not coverage diagnoses.
What Cover 2, Cover 3, Quarters and Man Do to Smash
Coverage labels organize the teaching; defender movement decides the throw.
Cover 2 is the classroom example. A low corner and a deep-half safety can leave a perimeter window between them. The corner route attacks that space, but it is not automatically open. A disciplined corner sinks beneath it, concedes the hitch and rallies forward. The quarterback has to take the short completion when that is the read.
Cover 3 is the common trap. The deep-third corner stays above the corner route while an outside linebacker or another underneath player expands beneath the hitch. A late hitch now travels toward a defender facing the quarterback. With both levels capped, the quarterback moves to the call’s defined answer instead of forcing the pair.
Quarters depends on the technique. One staff likes Smash against a particular quarters response; another dislikes where the deep corner ends up. Both can be right, because “quarters” alone does not say who controls the flat, whether the corner matches No. 1 or how fast the safety overlaps No. 2.
Man is leverage-dependent. The corner-route receiver may have room to work away from his defender, especially after influencing him inside. The receiver still has to win, and the quarterback still has to account for safety help.
| Structure | Conflict defender | Main danger | Answer |
|---|---|---|---|
| Cover 2 | Low corner | Corner sinks under the high route; safety overlaps | Clean short throw, or corner fitted away from the safety |
| Cover 3 | Underneath flat defender | Deep-third corner caps high; underneath player undercuts low | Called seam, dig or checkdown |
| Quarters | Depends on match and flat rules | Corner and safety bracket or exchange | Read the distribution; divide, seam or outlet if capped |
| Man | Assigned defender | Receiver loses leverage; safety helps over the top | Throw on a clear win, or the called complement |
The useful question is not “what coverage is it?” It is “who controls the flat, who is above the corner route, and where is the window?”
Coach the Routes to Leverage, Not Just Depth
The corner route needs a declared breakpoint, but reaching a depth does not make it correct.
Against man: close the cushion, influence the defender inside, break away. Do not bow the stem early and advertise the route. After the break, do not drift back toward the defender’s leverage.
Against zone with a deep defender overhead: attack that defender’s inside leverage before breaking to the corner. The goal is space away from the safety, not a cone. If an outside-third defender owns the normal corner landmark, flatten or otherwise adjust the route rather than running it into him.
The hitch is a spacing route too. After the turn, the receiver can work toward available space relative to the flat defender instead of standing on the chalkboard endpoint.
Choose the underneath route for the problem:
- Hitch: fast settle point, a clear low answer when the corner gains depth.
- Quick out: horizontal stress on the flat defender, but different spacing and timing.
- Whip, slant or another shallow route: keeps the short-plus-corner structure only if the quarterback’s timing and conflict key are retaught.
A quick out is not a cosmetic swap for a hitch. It arrives somewhere else and can change which defender is the practical read.
Fix these four errors first on film:
- Corner route drifts toward the safety: rework the stem and break angle.
- Underneath receiver stops in covered space: teach the permitted settle or adjustment.
- Short route arrives late: match its stem and break to the drop.
- Receiver landmarks and quarterback timing disagree: pick one landmark system and coach both positions together.
When to Leave the Smash Side
Three defenders over the two-route side is the warning. The defense has enough bodies to cap the short route, overlap the corner route and exchange responsibilities. The answer has to be in the call, not improvised after the quarterback’s feet stop.
Complementary pairings that staffs use: dig-flat, Drive, Y-Cross, post-dig-shallow, a backside seam or divide, and the running-back checkdown. None is universally best. The choice has to fit the protection, the personnel, the drop and the offense’s existing route language.
Against Cover 3, the deep corner stays above the corner route while an underneath defender closes the hitch. That is the moment to reach the called seam, dig or checkdown, not to hold the ball and throw the hitch after its window is gone.
Make the installation type explicit. Half-field: select the side, read it, check down when capped. Full-field: read the Smash side, then reset to a named backside combination with coached footwork. If the quarterback is expected to go from Smash to a backside dig, the protection and drop must support it and his feet must match it. “Find somebody late” is not a reset rule.
Add a Variation Only When It Solves a Defensive Problem
Install each tag for a stated reason.
The flat defender sinks without giving up width. Use a quick out for horizontal stress, and rebuild the timing rather than assuming hitch timing transfers.
The defense overloads the Smash side in Trips or 3x1. Add a seam or divide route to occupy deep coverage, or pair Smash with a backside dig. A post-dig-shallow structure gives a deliberate answer away from the overload.
Press leverage and coverage exchanges disrupt the releases. Use a switch release. Exchanging release paths challenges press leverage and forces defensive communication while the routes still resolve into an underneath route and a corner route.
The offense wants a new launch point. Sprint-out Smash keeps the high-low while the quarterback moves laterally. One published sprint-out installation adds a backside over route and permits a run when the throws are unfavorable.
Linebackers or safeties bite on run action. Play-action or a delayed corner. The fake and the later-developing route need more time than base Smash, so timing and protection demands change.
The field is compressed near the goal line. Aim the corner route into horizontal space toward the pylon and adapt the landmarks to the remaining grass instead of carrying open-field depths into the end line.
Keep the menu small: base 2x2 first, one 3x1 answer second, then one movement or play-action version if it addresses a recurring defensive response. More tags do not help while the base read is still inconsistent.
Drill and Grade the Read
Start with a diagram and a verbal read. Use a quarterback, the two route runners, a running back or outlet receiver, one conflict defender and one safety. A coach stands behind the quarterback and signals the defenders’ assigned reactions before the snap so the offense cannot see the answer early.
In the first phase, receivers align at normal splits and run the routes at teaching speed. The conflict defender does one of three things: sinks beneath the corner route, squats or drives the short route, or widens underneath the hitch or out. The safety holds his landmark or overlaps the corner route. The quarterback names the throw; he does not need to release the ball yet. Grade whether he names the correct conflict defender, sees the safety and reaches the proper answer.
Then run the same setup as a live half-field recognition period: snap, normal drop, full-speed routes. Mix in an occasional three-over-two picture so the quarterback has to use the checkdown or the called backside answer instead of treating every rep as a choice between two throws.
Early on, have the quarterback narrate the pre-snap sequence out loud: “Two high. Low corner. Overhang inside. Working left. Checkdown if capped.” Carry that vocabulary into routes on air, half-field recognition, 7-on-7, team periods and film. Changing the words between periods makes one read feel like several concepts.
Grade each rep in this order:
- Correct pre-snap identification.
- Correct conflict defender.
- Appropriate decision.
- Receiver at the declared landmark.
- On-time release.
The completion is secondary evidence. A poor decision becomes a completion when a defender slips; a correct decision becomes an incompletion because of protection, placement or a drop. Grade the operation before the outcome.
In the film room, stop the clip and ask: who controlled the flat, did the corner gain depth or drive, where did the safety finish, did the defense create three over two, which outlet did the call provide, and did the quarterback’s feet match it.
Exact splits, rep counts, footwork and protection rules belong to the offense’s broader system, not to Smash. What Smash requires is one version, one set of landmarks, one progression and one outlet. It becomes teachable when the quarterback reads an observable defender instead of guessing a coverage label, the receivers adjust to leverage without abandoning timing, and the staff adds variations only after the base decision is consistent.